
Last night, under Val’s tutelage, we pulled my ’87 Suzuki Intruder out of winter storage for a much needed spring cleaning tune-up. By the time I got to MotorGrrl at 7PM, Little Miss Suzi Ramjam (the Intruder’s new name for reasons I’ll explain later) was already up on the lift and ready for love with a bright red shop rag draped over the seat, handle bar straps holding her tight and tall, and Val next to the lift with a shiny ratchet wrench in-hand.
She had already lowered the battery from the box and informed me that it wasn’t holding a charge which kept the bike from starting. Damn. I wasn’t surprised though, I’ve had battery issues since I bought the bike almost two years ago so I can look forward to diagnosing the issue later. Now, in order to take the battery completely out of its little house you have to raise the frame a bit for the door to swing far enough down so the battery can drop out which leads me to the whole Ramjam thing. The Intruder is a lot of bike jammed into a relatively tiny frame. Precision Japanese engineering does not a happy American wrencher make. It takes a few simple tasks turning into many annoying projects to make this glaringly clear. From the angle of screw casings to the varied position of the carbs it’s almost impossible to just do a little tinkering. Time for us to tweak our approach and sprinkle on some patience and time with this baby.
{Cue Music}
First things first we determined the level of tuning that was needed. For her 16,500 miles, the manual’s recommended list was pretay long so we just started right at the top: Drain the oil and yes, I got it all over. Felt good.
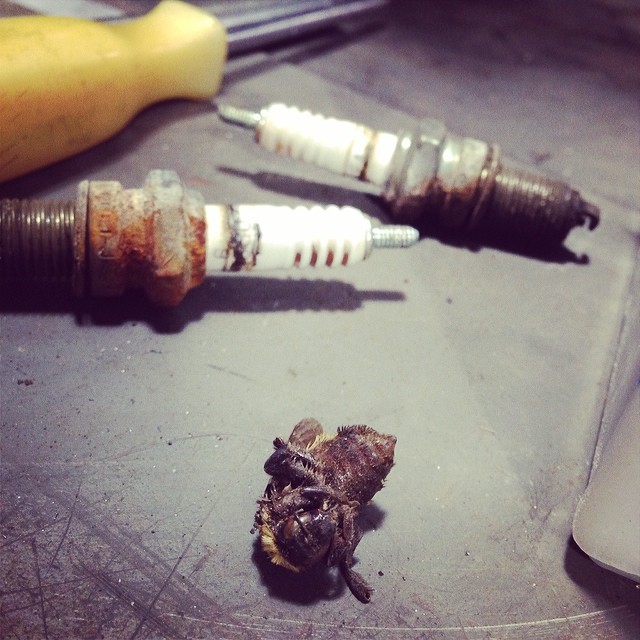
Then we set in to inspect the spark plugs.

Look at that smile. I was all, “Can’t wait to see these freakin’ spark plugs!” Let’s just reach in there and get ’em!” But first we had to remove the cylinder covers to get close enough to unscrew ’em. What we found were some FILTHY plugs and a beautifully preserved dead bumble bee! RIP.
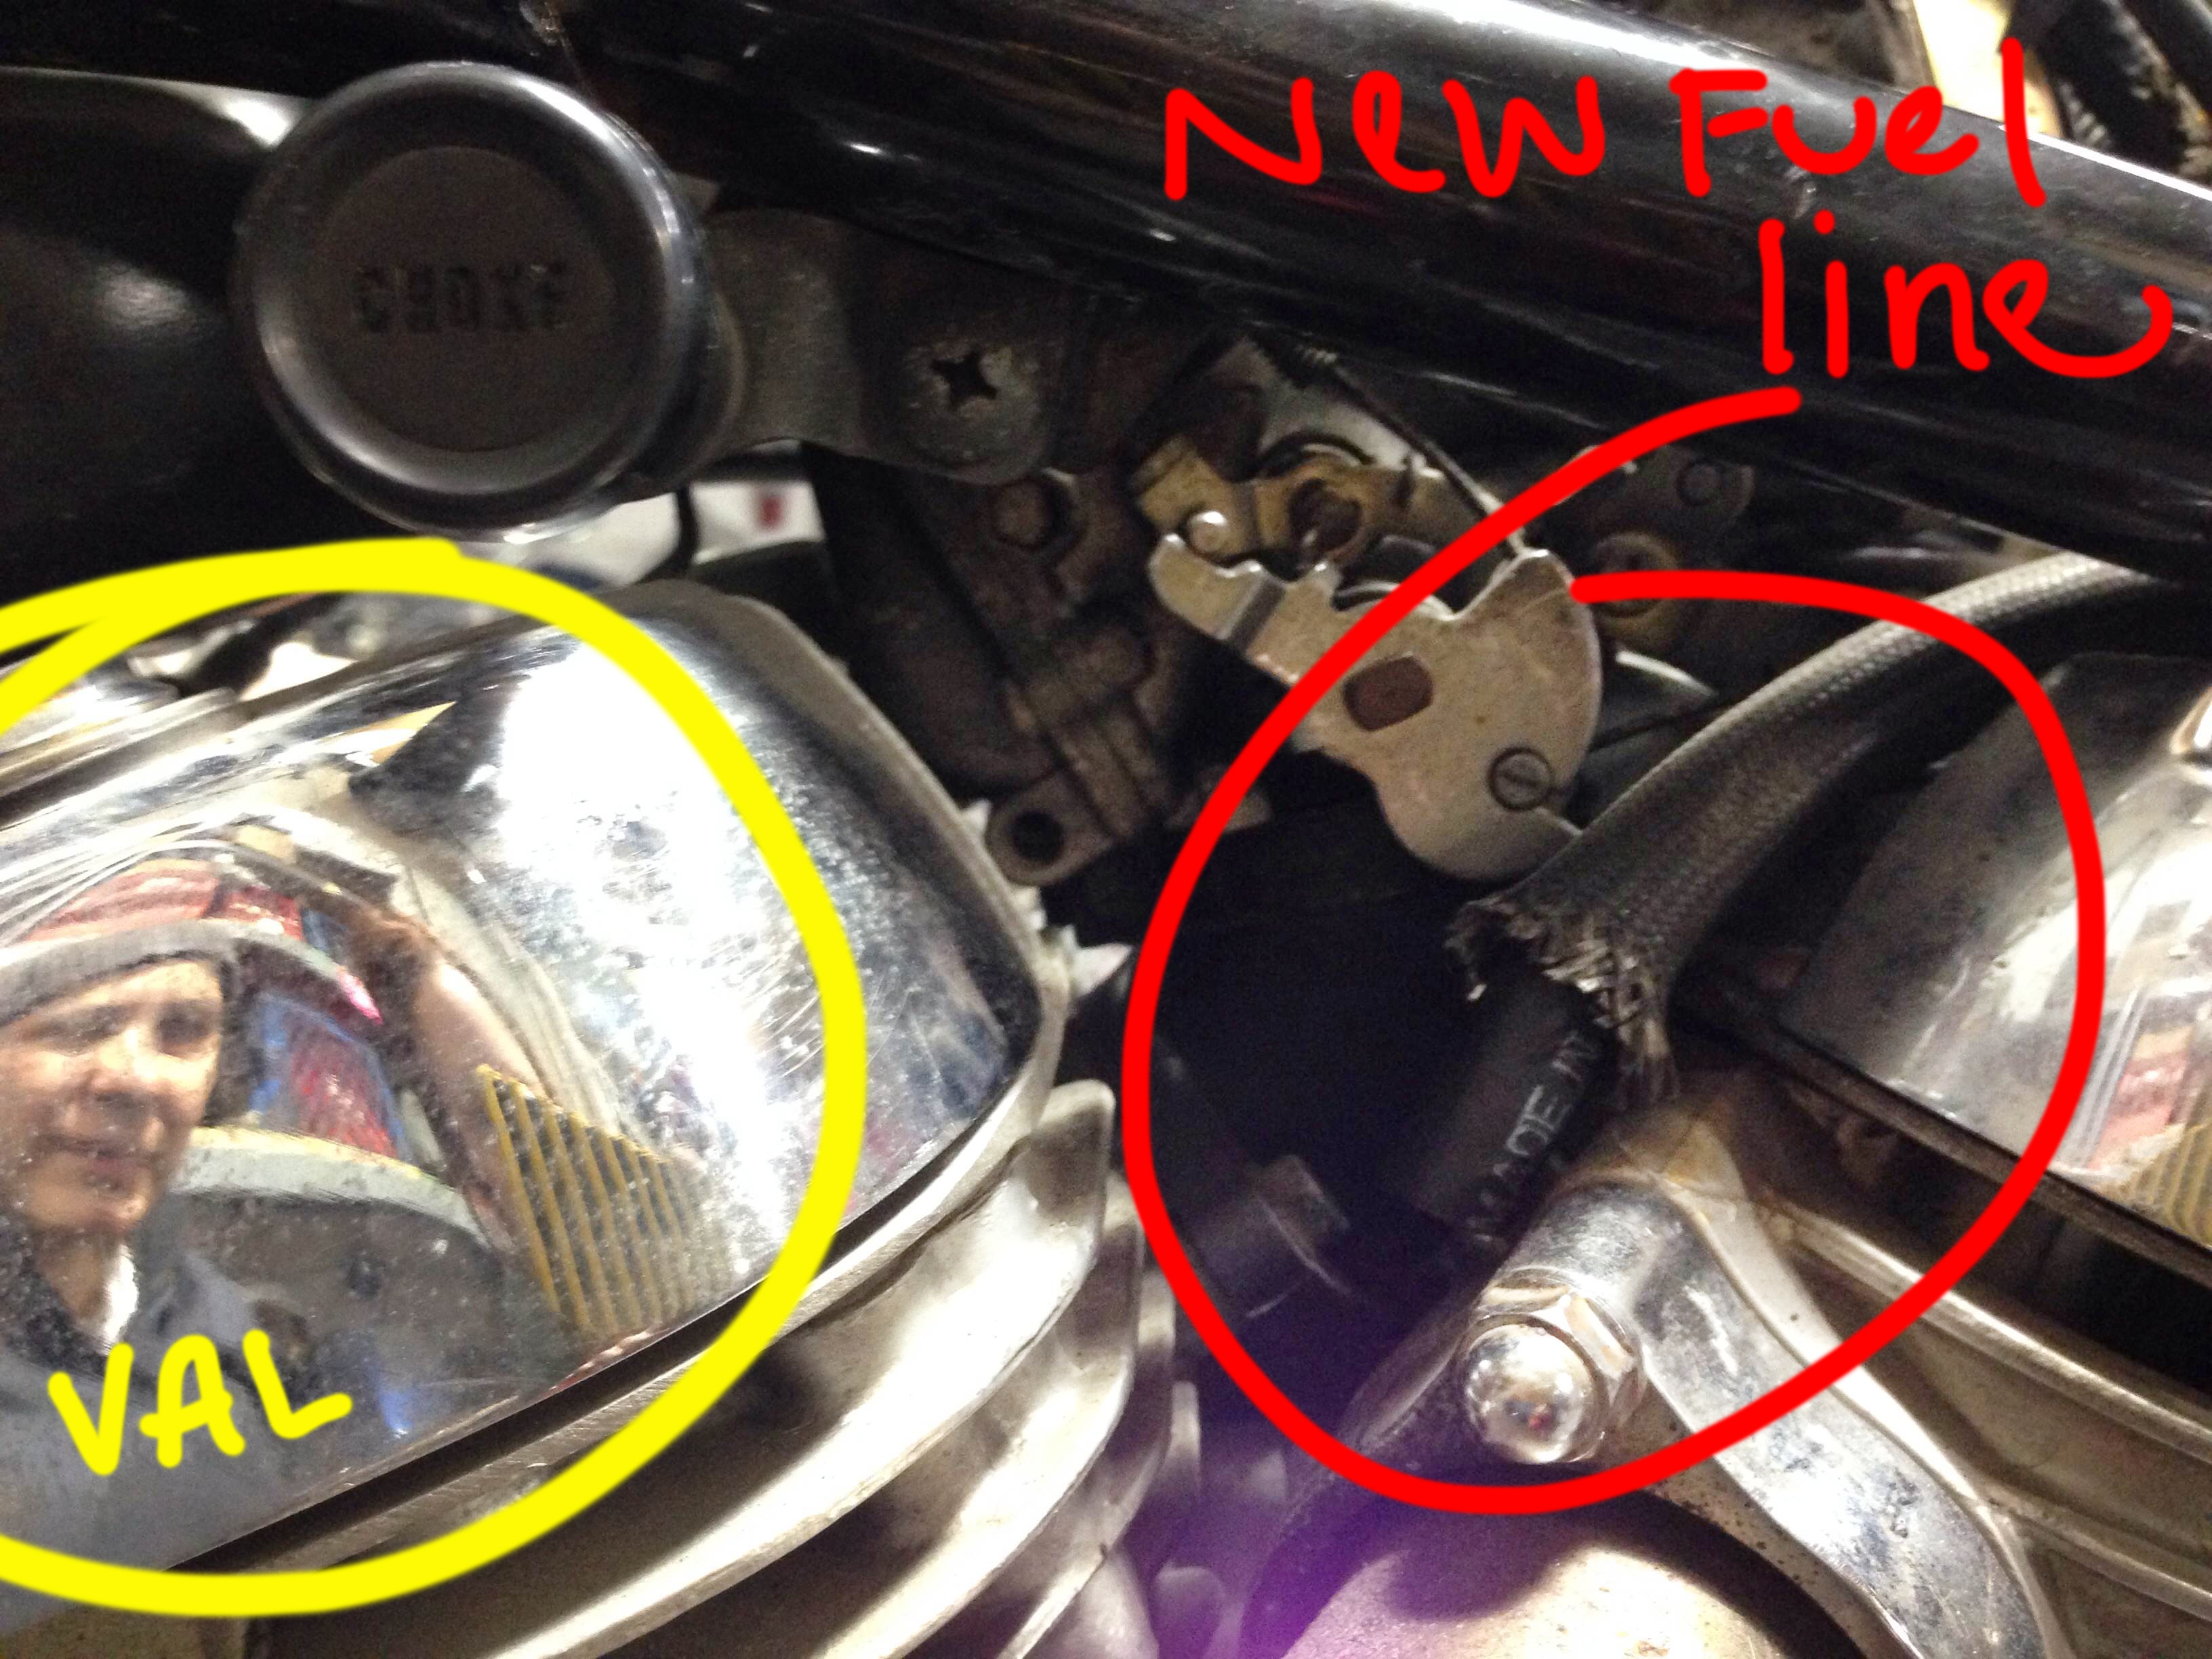
With fresh new plugs installed and a prayer offered for the dead it was back to the manual and the next step: air filters – one front, one rear. The rear filter was relatively easy to find once we removed the seat – match this diagram to this thing here. But since the front filter housing sat under the gas tank, it became time for that to come off. Yes, I got gas everywhere. And with that we learned that the tank end of my fuel line was pretty dry rotted and needed to be replaced. But one thing at a time.
Both air filters were pretty dirty but not in desperate need of replacement so we just blew them. With compressed air. Then spent a decent amount of time trying to get the dang hose reattached. Ramjam problem: due to its positioning, we couldn’t see or feel if the hose was attached in any way to the housing. We had to remove the ignition coils which flanked each side to get a better look. 45 minutes and just as many WTF’s later, we were finally able to move on to the fuel line.
With a flashlight we followed the current line starting from where we had detached it from the petcock down to where it connected to the fuel pump. To be expected, it was quite a tight squeeze but since we were in there and Val had a replacement hose we decided just to replace it. Right? JUST? Just replace it? Tonight?

I guess what we lack in smarts we make up for in conviction because we got the new fuel line in, but not before midnight. And though we knew there was more work to do we figured, let’s just get the tank back on, hook up the line, and go on home.
At that time Corinna, the forgotten 8th Dwarf (let’s call her “Greasy”), was packing up after killin’ it all night at the work table putting the transmission back together on her Yamaha. She provided some much needed muscle in our last stretch connecting the tight new line to the petcock.

I’m a lucky lady for having the following: a warm garage, tools, WOMAN-POWER (and Slade), great company from those who come to hang out, and a challenging bike that rewards me for the attention I pay to it (which it rightfully deserves).

Well this was fun! Thanks for reading! More to come!


Hahaaa! A brilliant, (gut) wrenching (busting) story… just made my day. Cant wait to see the Intruder returns!!
How many girls does it take to change a fuel line?! 😉
Putting a smear (but not too much) silicone grease helps. Like dielectric grease… which you can also use to put into the connections on your wiring harness to prevent corrosion and voltage leaks….
http://www.amazon.com/Permatex-22058-Dielectric-Tune-Up-Grease/dp/B000AL8VD2/ref=sr_1_1?ie=UTF8&qid=1393463043&sr=8-1&keywords=silicone+dielectric+grease
I guess I could try putting that reply on the blog…
OOps lol. I can’t help myself! I’m a reply-idiot!